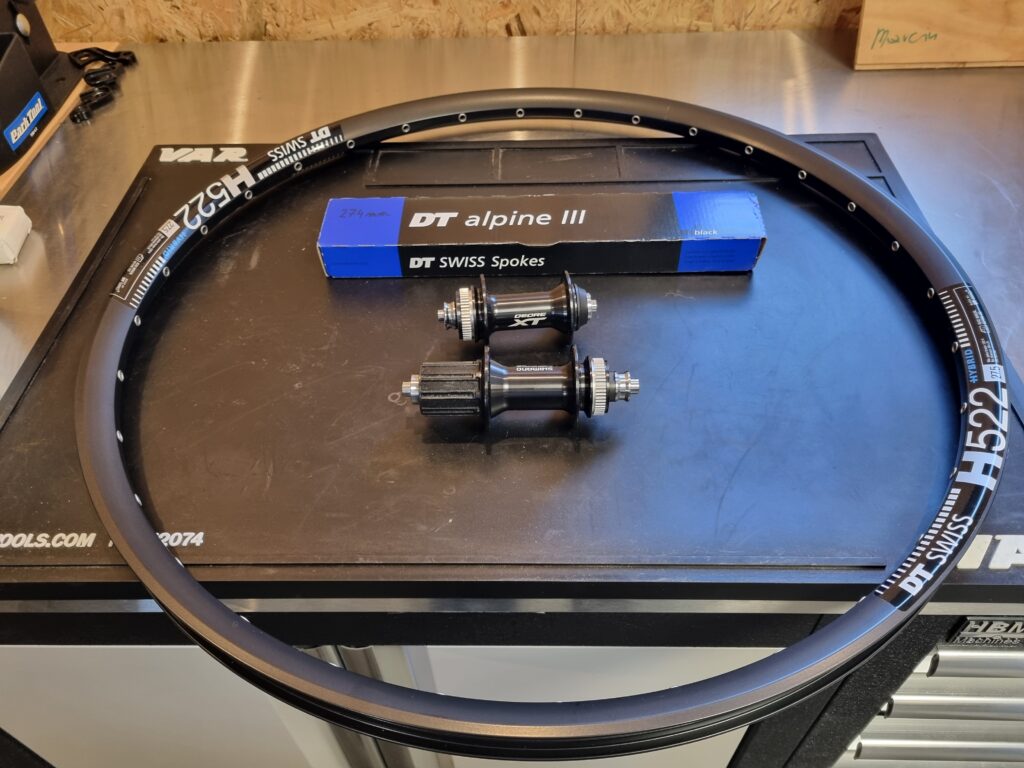
I start with a careful selection of the wheel components based on their intended use: for a tandem, robustness is paramount! The rim is double-walled and reinforced with eyelets. There are 32 spokes, designed to withstand high stress. The spoke nipples will be brass, slightly heavier than aluminium but more durable. The hubs are also robust, designed for mountain biking.
First step: lacing the spokes. I start with the leading spokes (the ones that “push” the rim when you ride).
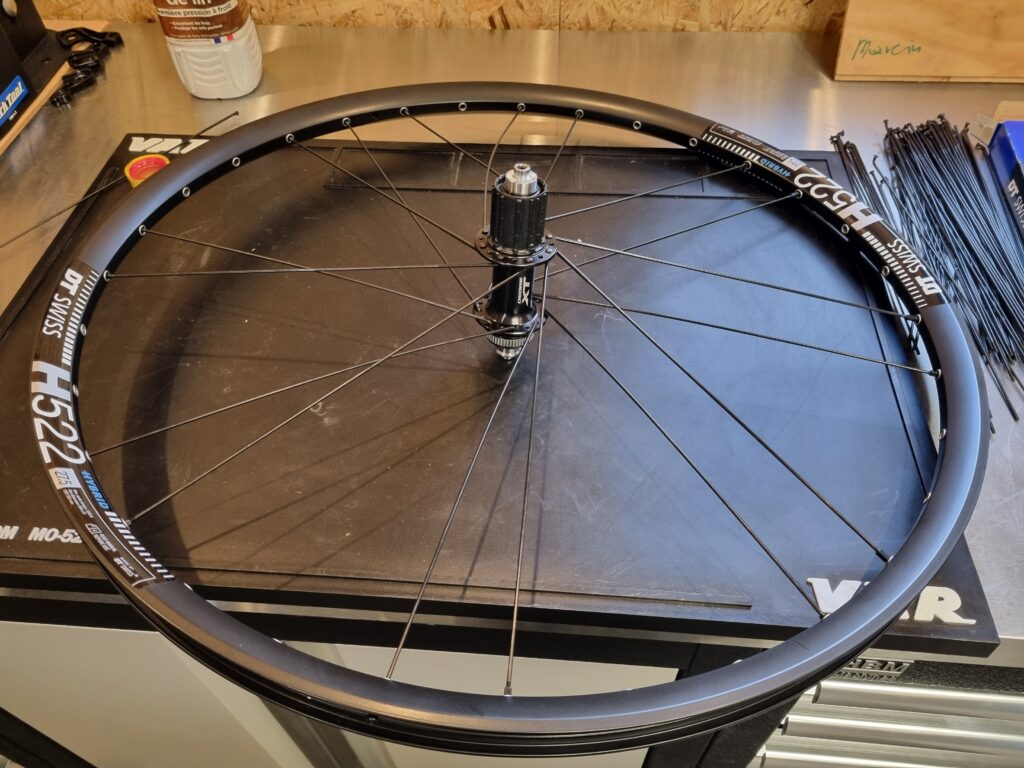
I’m continuing with the trailing spokes this time. I’ve chosen a 3-cross lacing pattern known for its robustness.
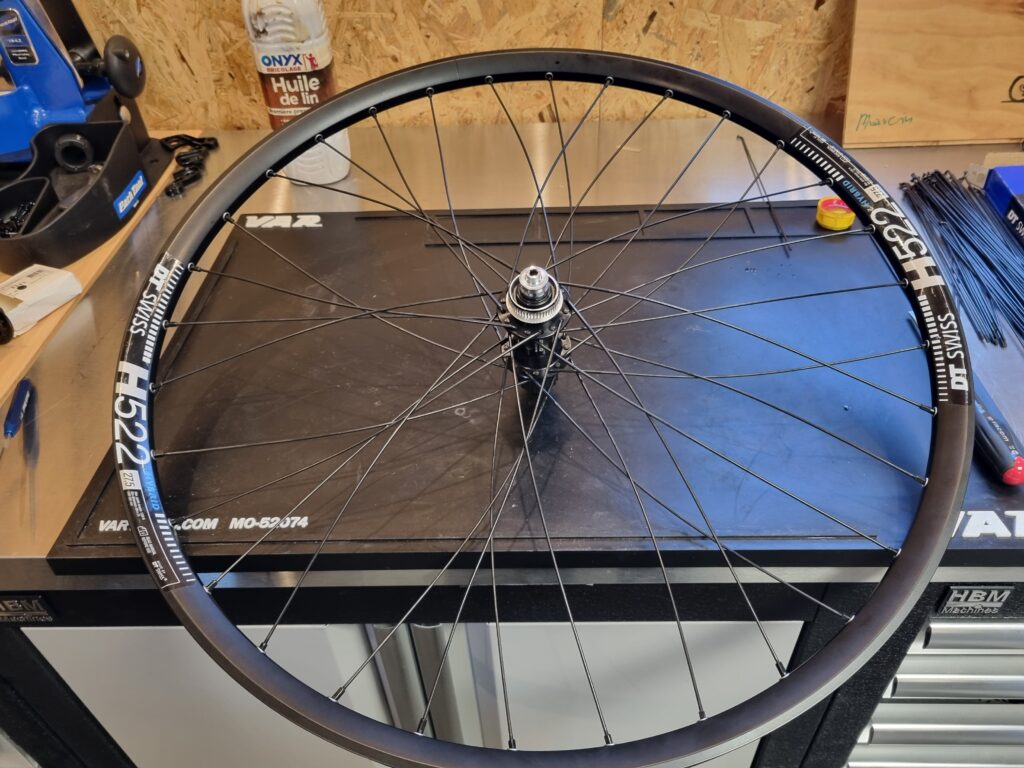
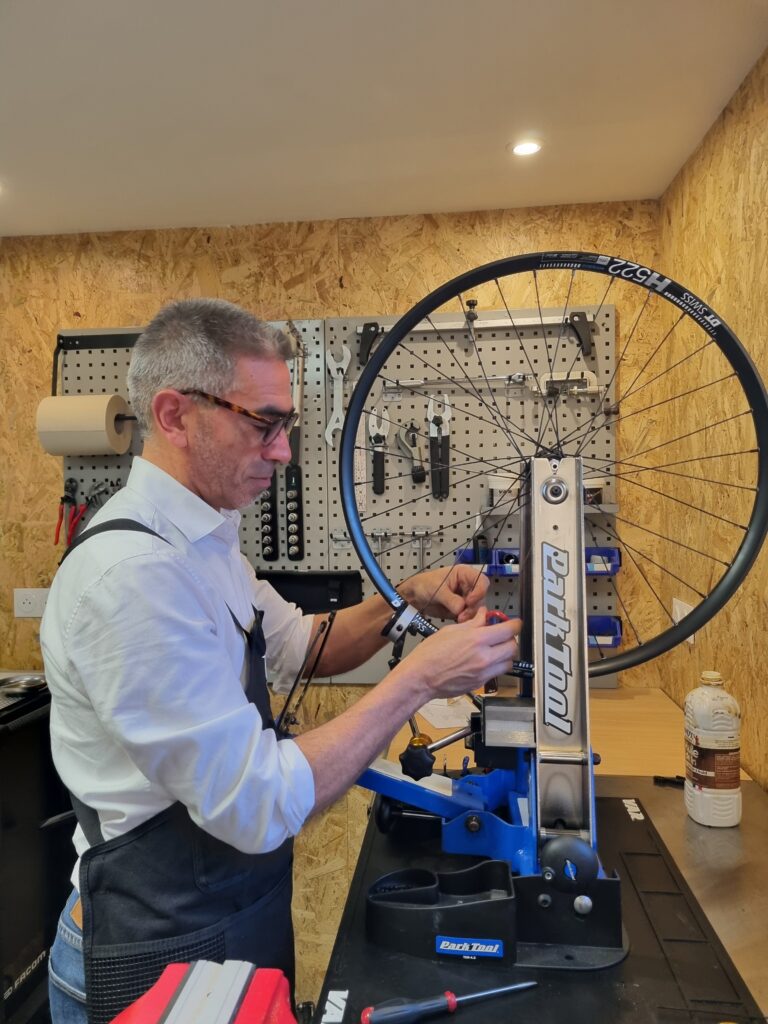
The wheel is now laced. The hardest part is about to begin: gradually tightening the spokes while striving to keep the wheel perfectly centered and without any wobble. I’m using a wheel trueing stand equipped with two mechanical dial indicators to help with this.
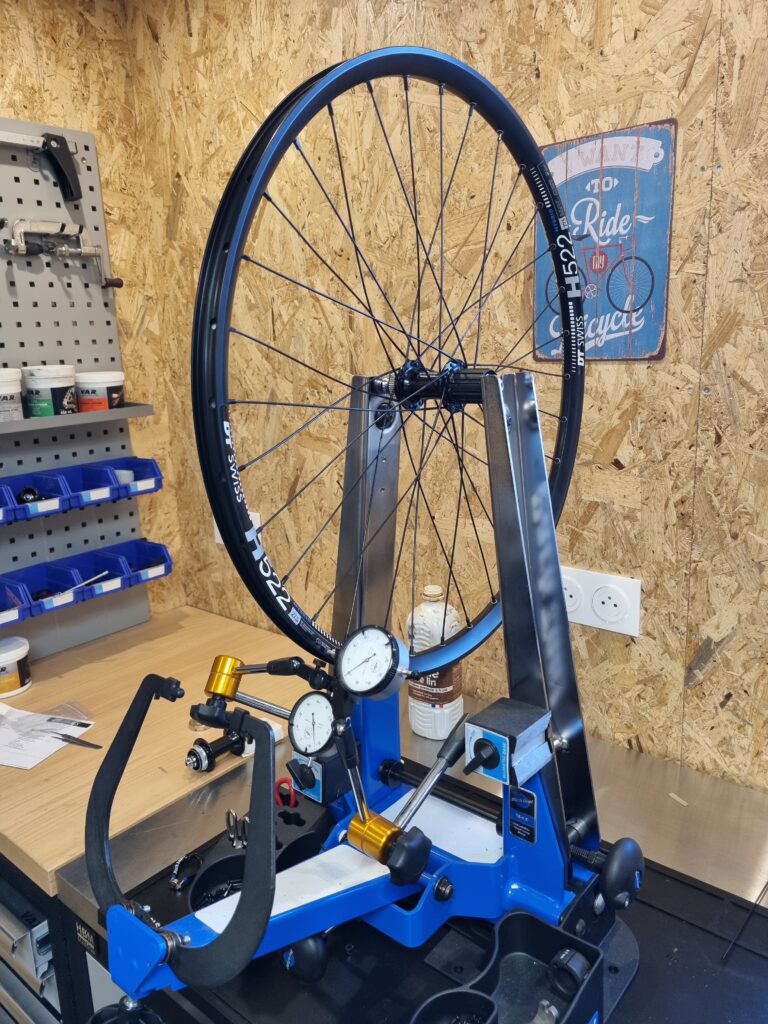
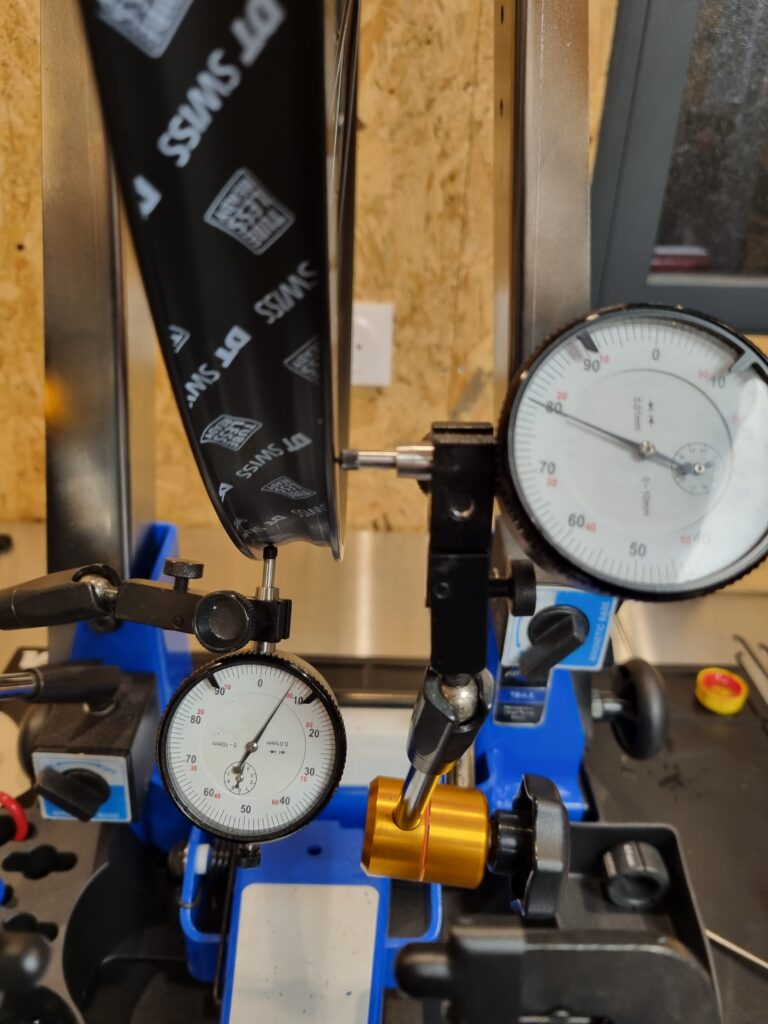
Once the wheel is roughly centered, it’s time to check the centering relative to the hub. I use a dedicated dial indicator for this operation.

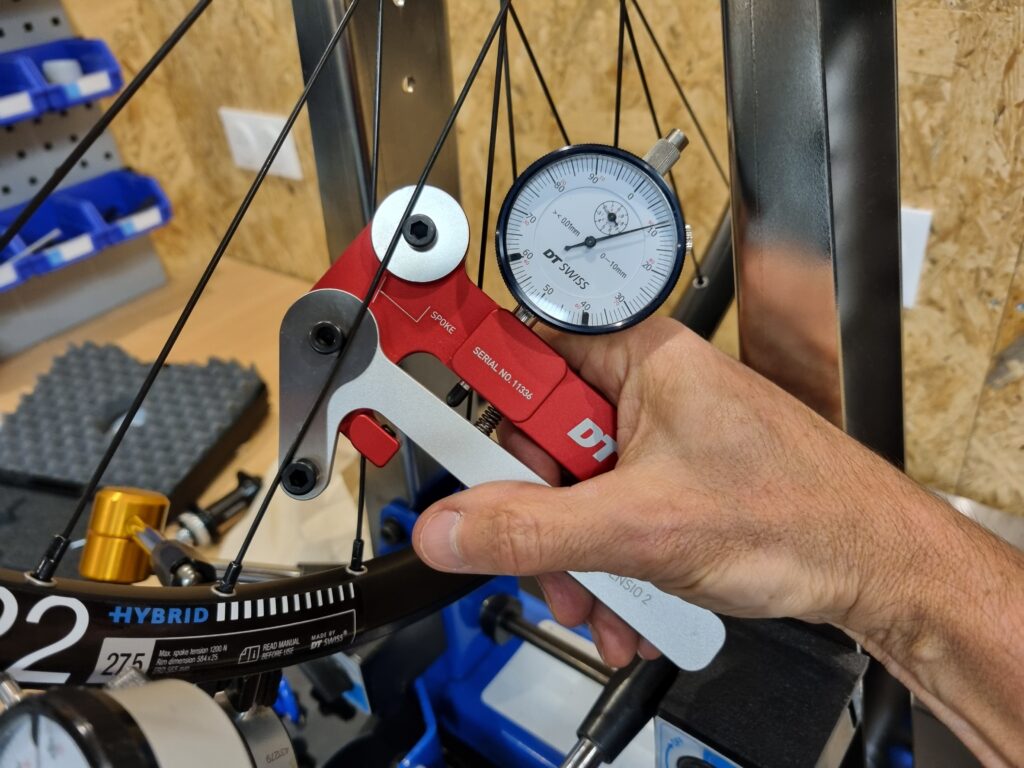
The final important step is tensioning the spokes. This is where the wheel’s performance, responsiveness, and longevity are determined. Using a spoke tension gauge, I’ll tension all the spokes until they reach the optimal value. Here, it’s nearly 120 kg! The secret lies in perfectly balancing the tension on the same spoke plate (cassette side or brake side), which requires a meticulous and methodical approach.
One last check to adjust the wobble and it’s finished!
Installing the rim tape to hide the spoke holes.
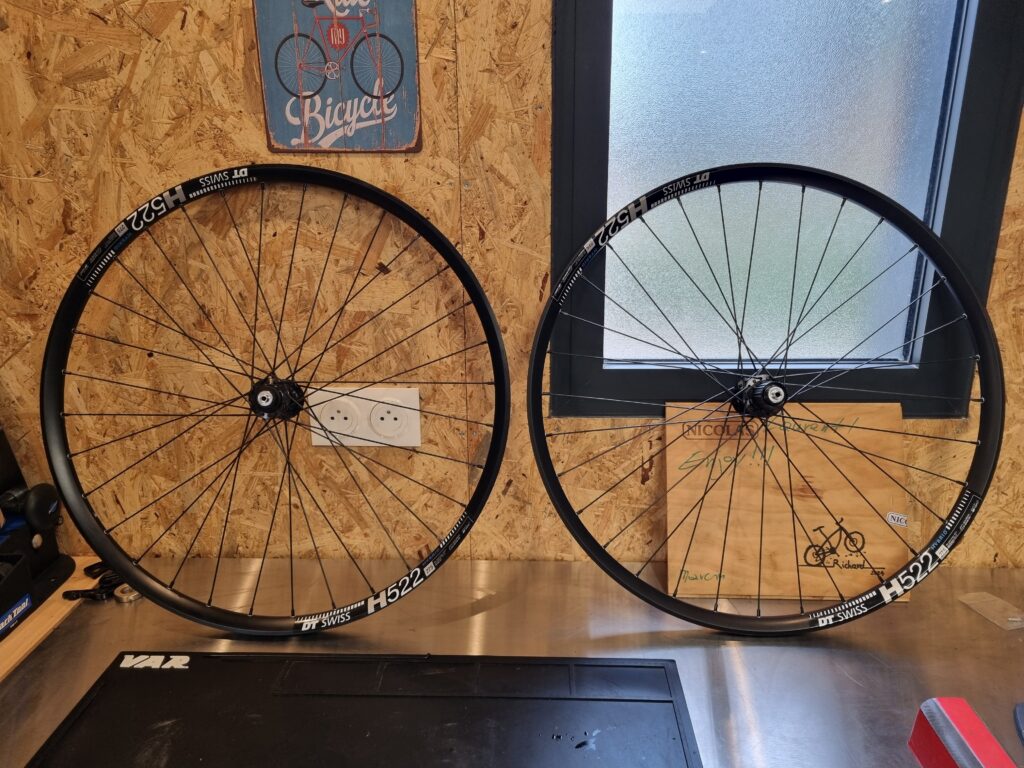
The finished wheelset weighs 2.14 kg.
Wow, that’s a seriously impressive build! It’s amazing to see the attention to detail going into something like a tandem wheel – thanks for sharing your process!
Thanks Greg! Building wheels is my passion hence the name of my workshop 🙂